
Google analytics is great. So great, that even if you do not plan to use it – you should install it just so collects data for the future. So, this post will walk you through the simplest method of setup to get you rolling, and will teach you the basics of using the dashboard, and slicing data.
Things you will need:
- A self-hosted WordPress Website (You can most likely do this on a .com hosted, but the process likely differs)
- A Google Account
- Tracking Code Manager By IntellyWP (Free Plugin)
- Google Chrome
Signing up for Google Analytics:
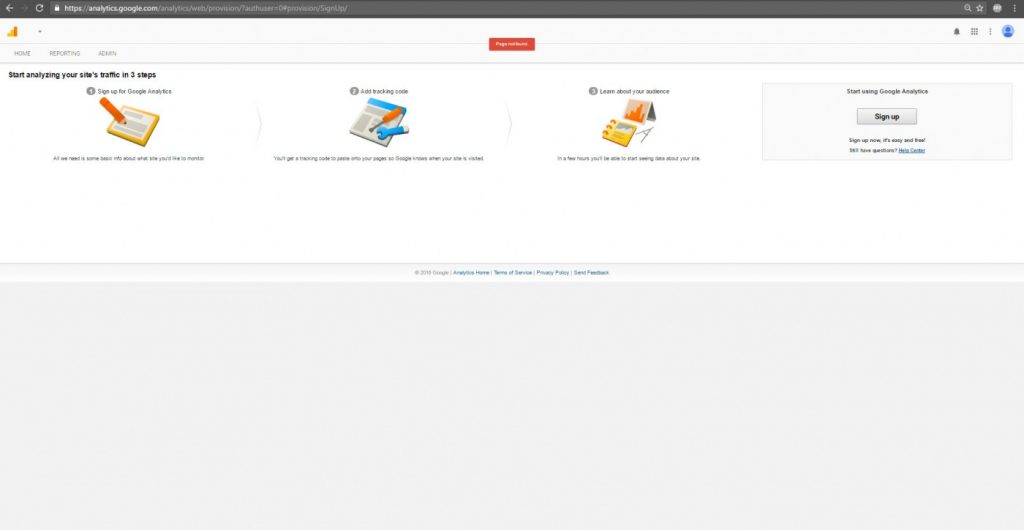
Once you have the plugin installed, navigate to analytics.google.com and “Sign Up”
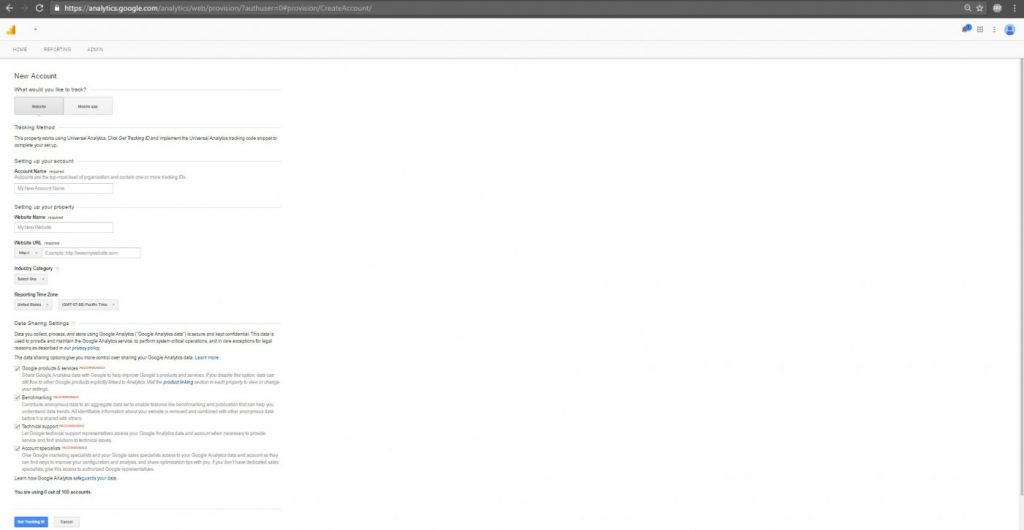
This will bring you to a page where you can fill out all the relevant information to the property you are creating. If you are doing this for a client with multiple websites, be sure to name the “Account name” properly. Every Google account can have multiple analytics accounts, and each can have properties associated.
Things to be aware of:
- Whether or not you use www before your domain matters here. Visit your site and put it exactly how it appears in your URL bar.
- Try and keep this as organized as possible by using top-level names for grouping if you will have 10 or 15 accounts, because it can get messy.
Grabbing the tracking code:
![]()
Once you have filled out your information, you will be brought to a screen like the one above. The code I have highlighted is the code that needs to going into your <head> tag. This can be done with a child theme, but using a plugin is simple and will stick if you change themes. It also makes managing multiple tracking codes a breeze.
The best one I have found so far is Tracking Code Manager by IntellyWP. It’s free, and it does nothing other than insert the code into the page so it isn’t a bloated plugin.
Installing the code into Tracking Code Manager:
![]()
After clicking “Add New Tracking Code”, you will end up with the screen above. Copy/Paste the tracking code from Google into the dark box.
The default settings are fine, but just incase make sure these are your settings:
- You want the code inserted before the </head> tag
- You want to ad this in as a standard tracking code
- You want this on your entire website
- *Do not* exclude pages or posts, unless this is intentional. You can have a different analytics property for each if you so choose, but I have never found a need.
Once this is complete, you simply hit save and you are good to go.
Testing the analytics property:
- Install Google Chrome (If you don’t have it already)
- Visit the Chrome Webstore and install the Tracking Code Assistant
- Once installed, enable it and navigate to your page and it will detect the tag and look for errors
The basics of the Google Analytics Dashboard:
To learn the basics, you will need data to work with. Rather than waiting on people to visit your website, there is a little known alternative – Google offers the analytics to their web store as a demo account. You can access this by clicking this link here when signed into your account.
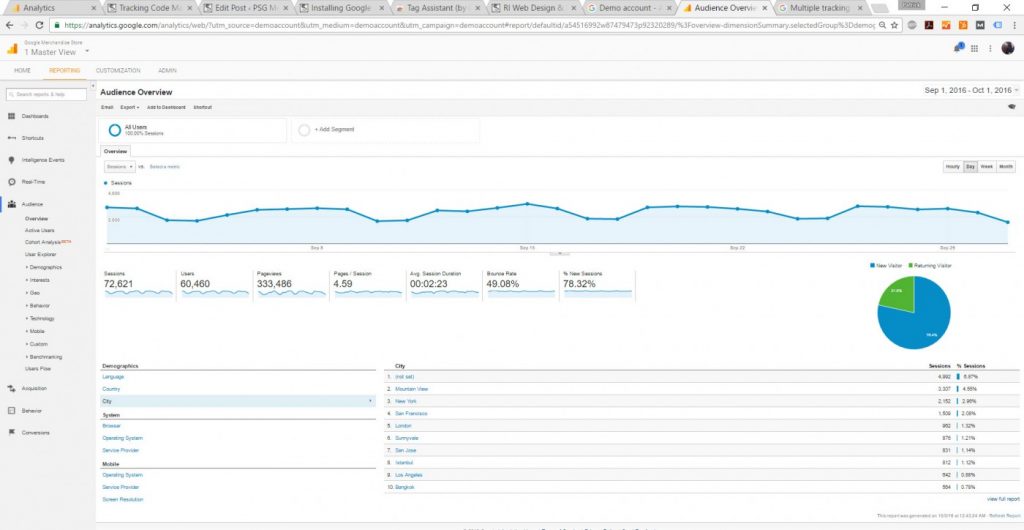
Some things to note:
All the different types of data you can access is to the left
By default, Audience Overview is where you will land
This data is for a specific time set (More on this in a second)
Controlling the data time period:
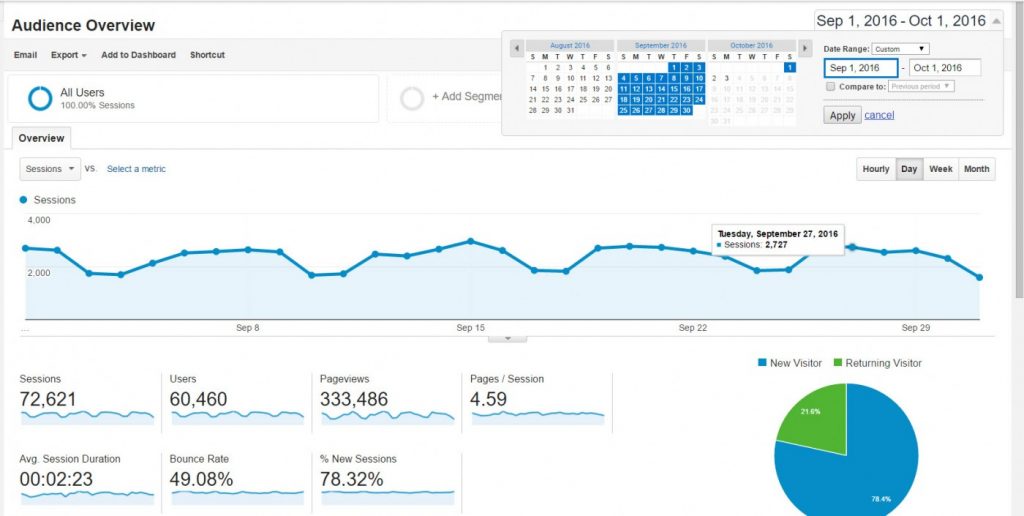
In the top right, you will see a date range. When clicked, you will get the above menu. The dates highlighted in blue is the data you are looking at.
In the top dropdown menu inside the date menu, you can find predefined date ranges such as Today’s Data, Yesterday, Last Week, Etc.
Below that, you can change the beginning and end date selections to change the data.
Also worth noting, below this entire menu is a ticker that lets you change how the line chart displays, so rather than looking at individual days, you can see how you do week to week, or month to month.
Using Comparisons:
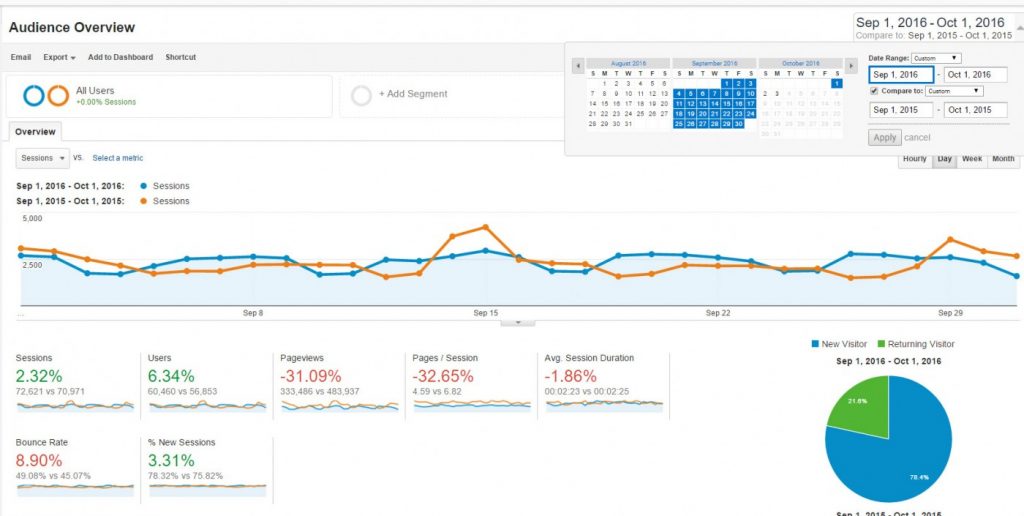
One powerful tool in this menu is the ability to compare data from different periods. By selecting ‘Compare to’ you can compare data in various ways. If you notice, by selecting this, the line chart up top changes to reflect the comparison, as does all the other data on screen.
By selecting ‘Previous Period’ in the dropdown, you can compare your selected date range to the same period directly behind it. So, if you have 7 days selected it will compare it to 7 days before that period.
By selecting ‘Previous Year’ you can compare the data to the selected period last year – which is extremely useful for seeing if you have been going in the right direction.
Segmenting Traffic:
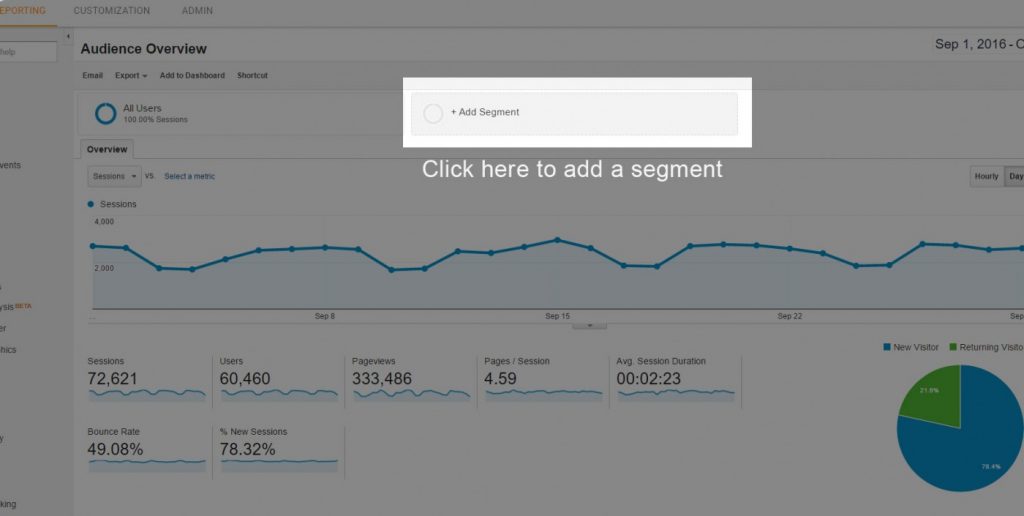
The next useful tool for slicing data is segmentation. This allows you to slice traffic based on certain metrics you set, and then compare the two as you did with date comparisons. Also, be sure to turn off date comparisons when trying this because all of the data can get messy.
Some ways you can use segmentation:
- Comparing mobile users to desktop users (Easy)
- Comparing Facebook traffic to Twitter, Linkedin, Pinterest, etc (Slightly harder, but we’ll go over it)
- Comparing people who buy something, to people who don’t
- & Much more
Searching for Premade Segments:
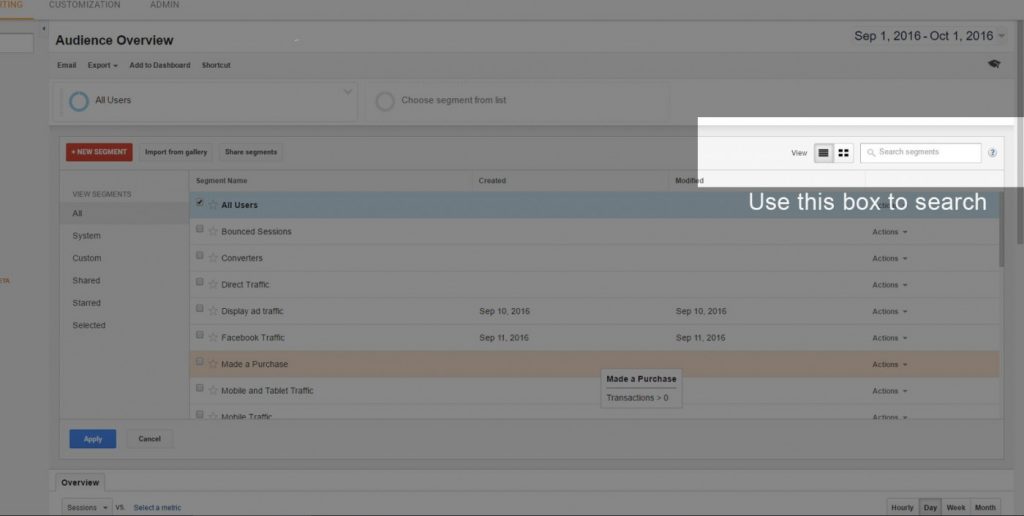
Analytics provides a number of default segments that will be useful to you. As shown above, you can easily search through these to find what you need.
To get started,
- Search for ‘Desktop’ and click the checkbox next to Tablet and Desktop Traffic
- Search ‘Mobile’ and also select this traffic
- Click apply in the bottom left
Your Analytics Dashboard will now look like this:
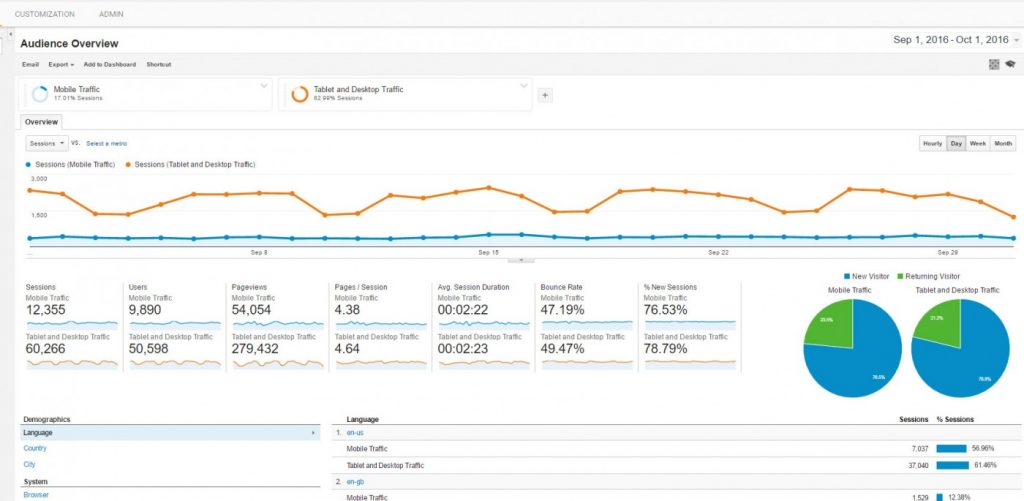
Now you can really start digging in to the data. If you notice, next to your segments will be a colored ring. Your Data is now color-coded. Blue for Mobile, Orange for Desktop and Tablet.
What I see in this comparison:
Desktop and Mobile metrics are relatively the same. Aside from there being a larger user base on desktops, we learn that average session duration, and pages per session is very close. This is a good thing. It tells us that the mobile version is just as functional as the desktop version, and isn’t affecting the viewing experience.
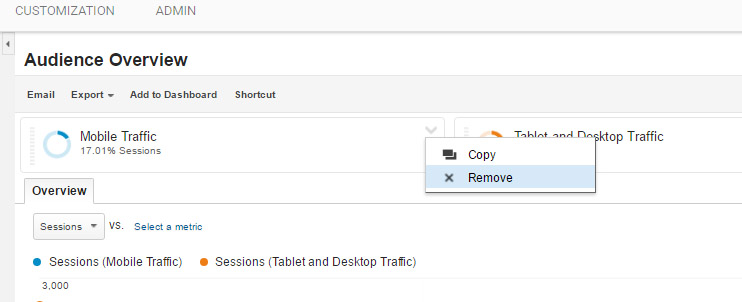
Removing your segments is easy. Just click the little fly down menu next to your segment and hit ‘Remove’
Creating a custom segment:
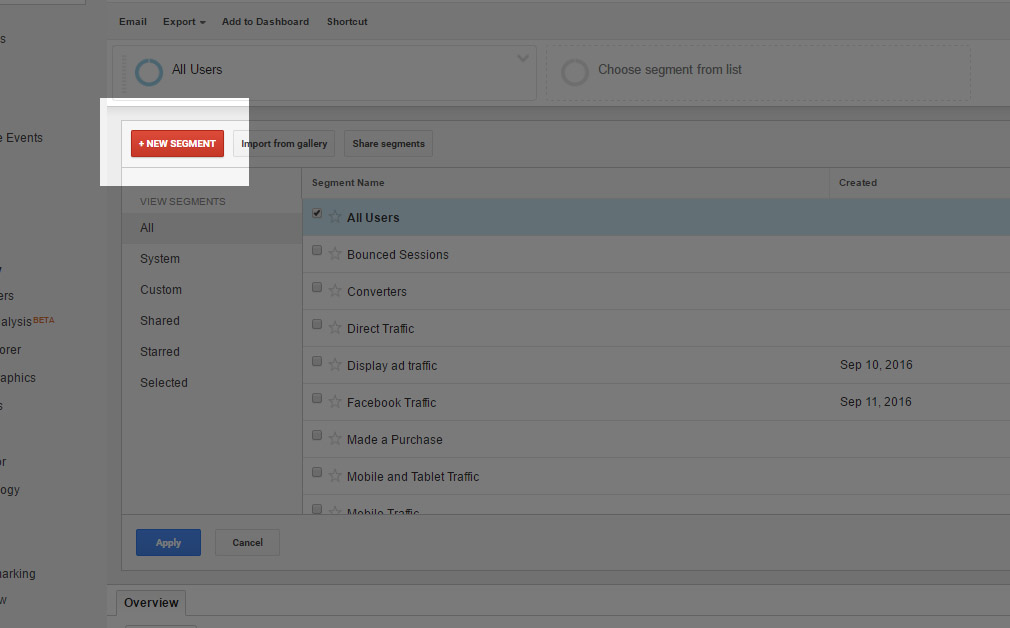
Remove the Desktop and Mobile segments, and you will return to ‘All Users’ which is where you started. Now, click the ‘+New Segment’ button.
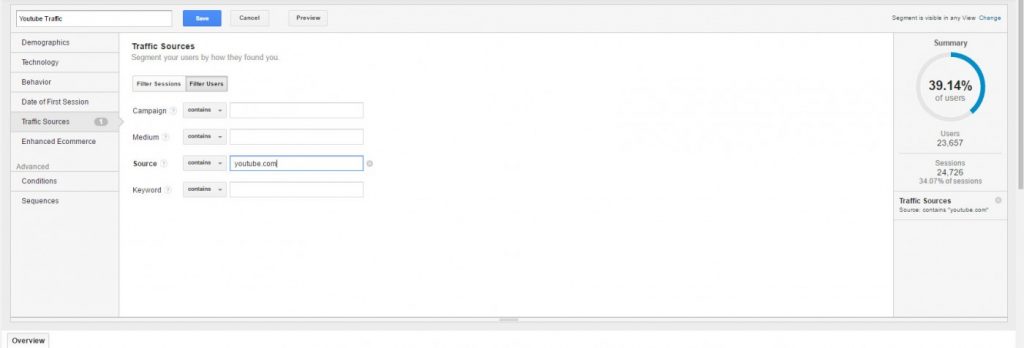
We’re going to compare Youtube Traffic to Direct Traffic. However, this same process can be done to Facebook vs LinkendIn, Adwords vs Organic, etc.
- On the top of the panel, you will see a space to name your segment. Do this, and do it carefully – because you might want to use this segment again.
- On the left panel, click ‘Traffic Sources’ to land on the above screen.
- Click the text field for ‘Source’, this will give you a dropdown to select all possibilities. Click Youtube.
- On the far right, you will see a summary of this segment. Be aware of this and make sure you see some traffic.
- On the top bar, click save. This will automatically add the segment.
- Repeat these steps for ‘Direct’ traffic, or use the Direct Traffic preset found by searching like you did before.
Comparing Youtube and Direct Traffic:
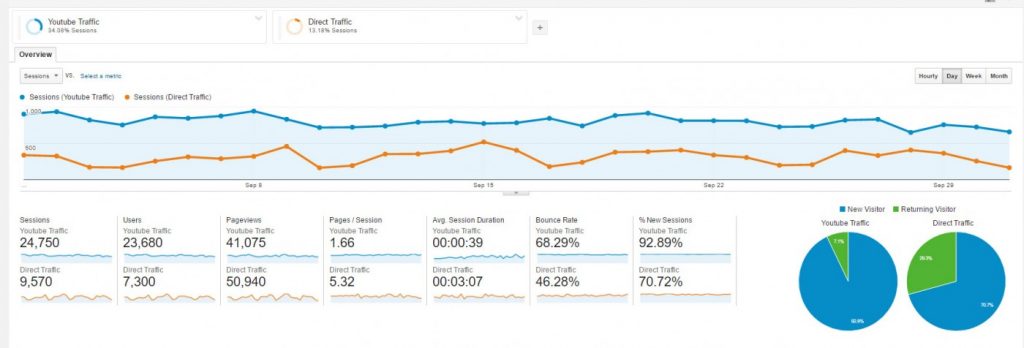
If all the above steps were completed successfully, you should be looking at this data.
Right off the bat, some things I notice are:
There is a lot less direct traffic. However, when compared to youtube, the direct traffic is of higher quality. Users that ended up there by typing in the URL truly wanted to be there, and spent way more time on the site, viewed more pages, and bounced less. There is also more returning visitors in the direct traffic.
Users likely came from a video ad. A big difference can be expected when comparing to a paid campaign.
To improve these metrics, I might suggest improving the relevancy of the video to better show the offerings of the store – which leads to more relevant traffic. When paying per click, it is in your best interest to get only those most likely to buy to click. Luckily, in Google’s case, they own YouTube so I highly doubt they bill themselves for their ads. So, any traffic for them is good traffic.
You can do more with segmentation:
There is a lot of parameters accepted. You can make this as complex or simple as you would like, just be sure to name everything properly so you don’t get confused.
Some things I use segmentation for:
Sorting by demographic to see how different ages and genders use a site differently.
Pulling data from different cities when running ad campaigns, to see how users use the site differently. This is handy for spotting trends in a locale. For example, one of my clients rents instruments. If a certain town spikes in traffic on our rentals page, I know that a school in that area started telling parents to rent instruments, and I can adjust the ad budget to favor that town.
Analyzing traffic of engaged users, by only viewing data with a session duration over 5 minutes, to see what is keeping them on site.
And much, much more. Segmentation is an extremely useful tool to rapidly pull data that matters from your analytics.
Putting it all together:
Now that you have the ability to install and segment/slice data, you can begin to learn a bit about the different types of your traffic. While this is by no means everything you can do in Analytics, you can learn quite a bit by simple comparisons in the Audience > Overview tab.
Congrats! You’ve made it through the whole thing!
You are now capable of installing analytics and slicing data. Now, you need to learn all of the available panels in analytics, and how to use what you just learned to make that data meaningful. Stay posted on my blog, and the next thing I will be going over is setting up conversion tracking.


0 Comments